Installing a GPS device for car tracking takes 10 minutes for a plug-and-play OBD-II tracker or 45 to 90 minutes for a hardwired setup that connects directly to the vehicle’s power supply. Here is exactly how to do it plus what UAE fleet operators need to know about device placement, heat management, cellular connectivity, and the specific compliance requirements that determine whether self-installation is permissible or whether certified professional installation is mandatory for your vehicle category.
The installation method matters as much as the device choice in UAE fleet operations. A correctly installed hardwired GPS tracker for cars routed through a fused power connection, mounted in a heat-protected location, and registered with the applicable UAE compliance programme portal produces a reliable, tamper-evident tracking record that satisfies ITC Asateel, ADNOC IVMS, and SIRA requirements. An incorrectly placed OBD-II tracker on a dashboard facing direct sunlight fails within weeks in UAE summer conditions and cannot satisfy any UAE compliance programme regardless of device certification status.
Key Takeaways
- Install method depends on use case: OBD-II plug-in (10 min, no tools) for personal/basic tracking; hardwired (45-90 min) is mandatory for Asateel, SecurePath, IVMS, and SIRA compliance
- Placement is critical in UAE heat dashboard/windscreen spots hit 80-90°C and kill consumer-grade devices within weeks; under-seat or behind trim panels is the safe zone
- Hardwired installs need professional certification bad wiring risks electrical faults and voids compliance certification
- Setup after install is fast SIM activation plus adding the vehicle to the VZone platform takes about 5 minutes per vehicle
- Compliance registration (Asateel) is handled by VZone’s platform team using device IMEI, not by the fleet client directly
Types of GPS Trackers for Cars and Their Installation Methods
OBD-II Plug-and-Play GPS Tracker for Cars
OBD-II GPS tracking devices plug directly into the vehicle’s OBD-II diagnostic port a 16-pin connector located under the dashboard on the driver’s side, standardised across most passenger vehicles and light commercial vans manufactured after 2001. Installation requires no tools, no wiring knowledge, and no vehicle modification the device draws power from the OBD port and begins transmitting GPS data once a SIM card is inserted or pre-activated.
OBD-II trackers are the appropriate choice for: personal vehicles where the owner wants basic GPS visibility without professional installation; corporate car fleets where basic tracking suffices and compliance is not mandated; short-term or temporary deployments; and evaluation or pilot programmes before committing to hardwired fleet-wide installation. They are not appropriate for UAE compliance programmes (Asateel, IVMS, SIRA) because their removability means they cannot provide the tamper-evident, continuous data submission that compliance programmes require.
Hardwired Vehicle GPS Tracker Device
Hardwired GPS tracking devices connect directly to the vehicle’s 12V or 24V electrical system typically tapping a fused circuit in the fuse box for permanent power that keeps the device active whenever the ignition is on (and in some configurations, also while the vehicle is parked, to detect tampering or movement). Hardwired installation requires routing power and ground wires from the fuse box to the device location, concealing the device and cables to prevent tampering, and securing the device mount to the vehicle chassis or body panel.
Hardwired installation is mandatory for: ITC Asateel compliance (all Abu Dhabi commercial vehicles), RTA SecurePath (Dubai rental cars, taxis, school buses), ADNOC IVMS (contractor vehicles), and SIRA GPS (security patrol vehicles). Professional installation by a certified installer is strongly recommended for commercial fleet deployments incorrect wiring can cause electrical faults, and non-compliant installation voids the compliance certification.
Portable / Magnetic GPS Tracking Device for Cars
Portable GPS trackers use an internal battery and magnetic mount to attach to any metal surface on or in a vehicle no installation required beyond placing the device. They are appropriate for temporary asset monitoring, short-term vehicle surveillance, or as a secondary tracking device in addition to a primary hardwired unit. In UAE fleet management, portable trackers have limited application because battery life is the primary constraint: at 30-second reporting intervals, most portable trackers deplete their battery within 7 to 14 days. For primary fleet GPS tracking, hardwired or OBD-II devices are standard.
| Installation Type | Time Required | Tools Needed | UAE Compliance | Best For |
| OBD-II plug-in | 5-10 minutes | None | Not compliant for Asateel/IVMS/SIRA | Personal vehicles, corporate cars, pilot programmes |
| Hardwired (professional) | 45-90 minutes | Wire stripper, fuse tap, drill (optional), cable ties | Compliant required for all UAE programmes | Commercial fleet, compliance-required vehicles |
| Portable / magnetic | 2 minutes | None | Not compliant | Temporary asset monitoring, secondary tracking |
Step-by-Step: Installing an OBD-II GPS Device for Car Tracking
⚠ UAE COMPLIANCE NOTE OBD-II GPS trackers do not satisfy UAE Asateel, IVMS, or SIRA compliance requirements. If your vehicle requires UAE compliance GPS, proceed to the hardwired installation section instead. |
| 1 | Locate the OBD-II Port Sit in the driver’s seat and look under the dashboard on the driver’s side the OBD-II port is a 16-pin trapezoidal connector, typically located within 60 cm of the steering wheel. In most UAE-market vehicles it is either visible immediately or behind a small plastic cover. Common locations: under the dashboard left of the steering column (most common), behind an access panel beneath the steering wheel, or inside the centre console on some models. |
| 2 | Prepare the SIM Card Before plugging in the device, ensure the SIM card is correctly inserted if the device requires a physical SIM. Most VZone International OBD-II devices come with a pre-installed, pre-activated UAE SIM (du or Etisalat) check the device documentation to confirm whether SIM activation is required before first use. If a separate SIM is required, purchase a data-only SIM from a du or Etisalat UAE store, register it in the device’s SIM slot, and confirm the APN settings match the SIM network (instructions in the device documentation). |
| 3 | Insert the Device into the OBD-II Port Align the device’s 16-pin connector with the OBD-II port and push firmly until it clicks into place. The device should sit flush against the port a loose connection causes intermittent data transmission. If the device protrudes significantly from the port (common in OBD-II ports located in low-clearance positions), consider an OBD-II extension cable to position the device in a less exposed location. |
| 4 | Turn the Ignition to Accessory or Start the Engine Turn the vehicle’s ignition key to the accessory position (one click before engine start) or start the engine. The GPS device draws power from the OBD-II port the moment the ignition is active. Most devices have an LED indicator a flashing green or blue light confirms GPS signal acquisition; a flashing red or orange light indicates no GPS fix yet (normal for the first 30-60 seconds outdoors). Allow 2 minutes with clear sky view for the device to acquire its first GPS fix. |
| 5 | Verify on the Fleet Dashboard Log into the VZone International fleet platform (web browser or mobile app) and confirm the vehicle appears on the map at the correct location. The device should show its current GPS coordinates within 3 to 5 minutes of ignition-on. Verify that the vehicle’s status shows as ‘active’ and that position updates are occurring at the configured interval. If the vehicle does not appear within 10 minutes, check: SIM card seating, cellular signal indicator on the device, and whether the OBD port is supplying power (use a test light or multimeter on pin 16 of the OBD port). |
Step-by-Step: Hardwired Vehicle GPS Tracker Device Installation
Professional Installation Recommended for UAE Compliance Hardwired GPS installation for Asateel, IVMS, SIRA, or SecurePath compliance must be performed by a certified installer VZone International’s installation team covers all seven UAE Emirates. Incorrect wiring can cause electrical faults and invalidates compliance certification. The steps below describe the professional installation process for reference. |
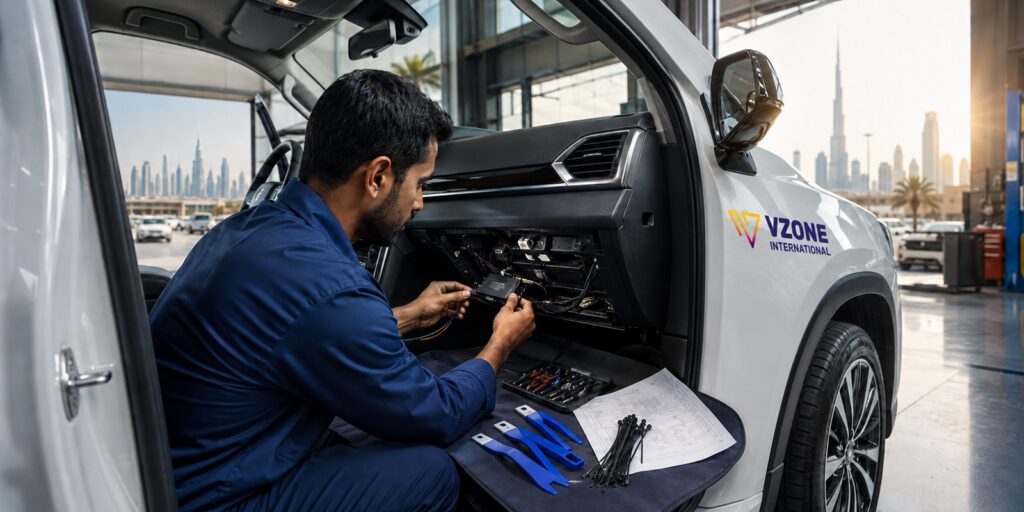
| 1 | Gather Tools and Verify Device Specifications Required tools: wire stripper/crimper, fuse tap kit (add-a-fuse or blade fuse tap), electrical tape or heat-shrink tubing, zip/cable ties, trim removal tools (plastic pry tools to avoid scratching interior panels), multimeter. Confirm the device’s power input specification most commercial GPS tracking devices for cars operate on 10-30V DC (covering both 12V petrol/diesel cars and 24V heavy commercial vehicles). Confirm the maximum current draw (typically 50-150mA active) to select the appropriate fuse rating for the tap (5A fuse is standard for GPS devices on a 12V circuit). |
| 2 | Choose the Device Mounting Location Select the installation location before running any wiring the location determines cable routing. For UAE conditions: avoid the dashboard or windscreen area where direct sunlight creates temperatures exceeding 70°C (device failure risk for non-enterprise-rated hardware); preferred locations are behind the dashboard trim panel, under the front passenger seat, inside the centre console, or in the boot/trunk near the power distribution point. The location should be hidden from casual inspection (tamper resistance), accessible for maintenance, and within cable reach of a fused power circuit. |
| 3 | Access the Fuse Box and Identify a Switched Circuit Locate the vehicle’s fuse box most passenger vehicles have a main fuse box under the dashboard on the driver’s side; commercial vehicles may have additional fuse boxes in the engine bay or cab. Using the vehicle’s fuse box diagram (inside the fuse box cover or in the owner’s manual), identify a switched fuse circuit one that is active when the ignition is on and inactive when the ignition is off. Suitable circuits: cigarette lighter fuse, radio fuse, or accessory power fuse. Verify the circuit is switched using a test light or multimeter: probe the fuse slot with ignition off (no power) and ignition on (power present). This confirms the device activates and deactivates with the ignition. |
| 4 | Install the Fuse Tap Remove the identified fuse from its slot. Insert it into the output slot of the fuse tap (the slot that maintains the original circuit). Insert the fuse tap assembly into the fuse box slot the tap adds a second output from the same circuit. Connect the GPS device’s positive power wire to the fuse tap’s secondary output terminal using a crimp connector. The device now draws power from the same switched circuit as the original fuse, protected by the tap’s fuse rating (typically 5A). Replace the tap assembly into the fuse box slot firmly. |
| 5 | Connect the Ground Wire The GPS device’s ground (negative) wire must connect to a reliable chassis ground point a bolt or screw that is electrically connected to the vehicle’s metal body. Identify a ground point near the device’s installation location: a seat-mounting bolt, trim-panel screw going into metal body, or the vehicle’s OBD ground pin (pin 4 or 5). Strip 10mm of insulation from the ground wire, attach a ring terminal, and secure it under the identified ground bolt. A poor ground connection causes intermittent device operation and GPS data gaps. |
| 6 | Route and Conceal Cables Route power and ground cables from the fuse box to the device location using existing cable channels behind trim panels use trim removal tools to pry panel edges and feed cables behind rather than across visible surfaces. Secure cables with zip ties at 20-30 cm intervals to prevent rattling and chafing against moving parts. Avoid routing cables near heat sources (exhaust routing through the floor, engine compartment heat shields), sharp edges (cable insulation damage), or moving parts (pedals, seat rails). For tamper resistance, cables should be fully concealed behind trim panels rather than running exposed under the dashboard. |
| 7 | Mount the Device Securely Mount the GPS tracking device at the chosen location using the included mounting bracket, self-adhesive pad, or cable-tie loops. For UAE compliance deployments, the mount must be secure against vibration commercial vehicles operating on construction sites or desert roads generate significant vibration that can dislodge adhesive-mounted devices. For hardwired compliance installations, VZone International’s installation team uses bracket mounts secured with self-tapping screws to body panels tamper-evident and vibration-resistant. |
| 8 | Test, Verify, and Register for UAE Compliance Restore all trim panels and test the installation: turn ignition on, confirm device power indicator is active, confirm GPS fix acquisition within 2 minutes outdoors, and verify the vehicle appears on the fleet platform map at the correct location. For UAE compliance programmes: Asateel registration is completed through the ITC portal using the device IMEI and vehicle registration details VZone International manages this registration for all fleet clients. Verify that the compliance portal shows the vehicle as ‘active and submitting’ before closing out the installation. |
Best Placement for a GPS Tracking Device for Cars in UAE Conditions
Heat Considerations Why Dashboard Placement Fails in UAE
Dashboard and windscreen placement is the most common installation mistake for GPS tracking devices in UAE and in most other climates, it works fine. In UAE summer conditions, the internal temperature of a vehicle parked in direct sunlight reaches 80°C to 90°C within 20 to 30 minutes of engine shutdown. A GPS device rated to 70°C operating temperature (the standard for enterprise-grade devices) will survive brief exposure at these temperatures but will have a shortened operating life; a consumer-grade device rated to 60°C will fail within weeks. The practical rule for UAE GPS tracker placement: if it is in a location that receives direct sunlight through the windscreen or side windows, it is in the wrong location.
| Location | UAE Heat Exposure | Signal Quality | Tamper Resistance | Compliance Suitability | Recommended? |
| Dashboard (top) direct sun | Extreme (80-90°C) | Excellent clear sky view | Low visible and accessible | No heat failure risk | No |
| Dashboard (under, behind trim) | Moderate (50-65°C) | Good partially obstructed | High concealed | Yes if heat-rated device | Yes for enterprise devices |
| Under front passenger seat | Low (35-45°C) | Good clear above | High not visible | Yes | Yes preferred for cars |
| Inside centre console | Low (35-45°C) | Moderate partially obstructed | High hidden | Yes check signal | Yes verify signal first |
| Behind rear seat / boot area | Low (35-45°C) | Good | High | Yes | Yes for vans/SUVs |
| Engine bay (external devices) | Very high (engine heat + ambient) | Excellent | High | Specialist hardware only | Only with rated hardware |
| Roof lining area | High (near roof in sun) | Excellent sky view | High concealed | Yes if heat-rated | Yes for enterprise devices |
Signal Strength Optimisation
GPS signal is received from satellites overhead the device needs a relatively clear view of the sky above the vehicle to acquire and maintain a reliable position fix. Metal body panels, engine components, and heavy tinting film can attenuate GPS signal, increasing time-to-first-fix and reducing position accuracy. For hardwired installations, if the device is mounted in a location with signal obstruction (deep inside a metal-framed centre console, for example), an external GPS antenna routed to the roof or near a window resolves the obstruction without compromising the thermal protection of the device location.
Tinted windscreens extremely common in UAE vehicles to manage solar heat gain have variable GPS signal impact depending on the metallisation used in the tint film. Ceramic tints have minimal GPS impact; metalised tints can significantly attenuate GPS signal through the windscreen. If dashboard area mounting near the windscreen is preferred, testing with the specific vehicle’s tinted windscreen before final installation confirms whether signal is adequate or whether an external antenna is required.
Tamper-Proof Mounting for Commercial Fleets
For commercial fleet deployments where driver or third-party interference with the GPS device is a risk, the installation should be tamper-evident: cables fully concealed behind trim panels, device mounted with screws rather than adhesive, and the device location not disclosed to drivers (in most fleet management policies, drivers are informed that GPS tracking is active without being told the specific device location). VZone International’s compliance installations include a tamper-detection feature in the device configuration any physical movement of the device from its mount or disconnection of the power wiring generates an immediate alert to the fleet manager, enabling rapid investigation of any tampering attempt.
Connecting Your GPS Tracker for Cars to the Monitoring Dashboard
SIM Activation du and Etisalat UAE
Active GPS tracking devices require a UAE cellular SIM to transmit position data. Two options exist: a pre-configured SIM supplied with the device by VZone International (the standard approach for fleet deployments the SIM is already activated, APN-configured, and included in the monthly platform subscription with no separate SIM management required); or a separately purchased data SIM from du or Etisalat. For self-managed SIM procurement, request a machine-to-machine (M2M) or IoT data SIM these are optimised for continuous low-volume data transmission (GPS position data) rather than the higher-bandwidth consumer mobile plans. APN settings for du: du; for Etisalat: internet. Most enterprise GPS devices for commercial fleets support dual-SIM for automatic network failover if the primary network drops signal.
VZone Platform Walkthrough First Vehicle Setup
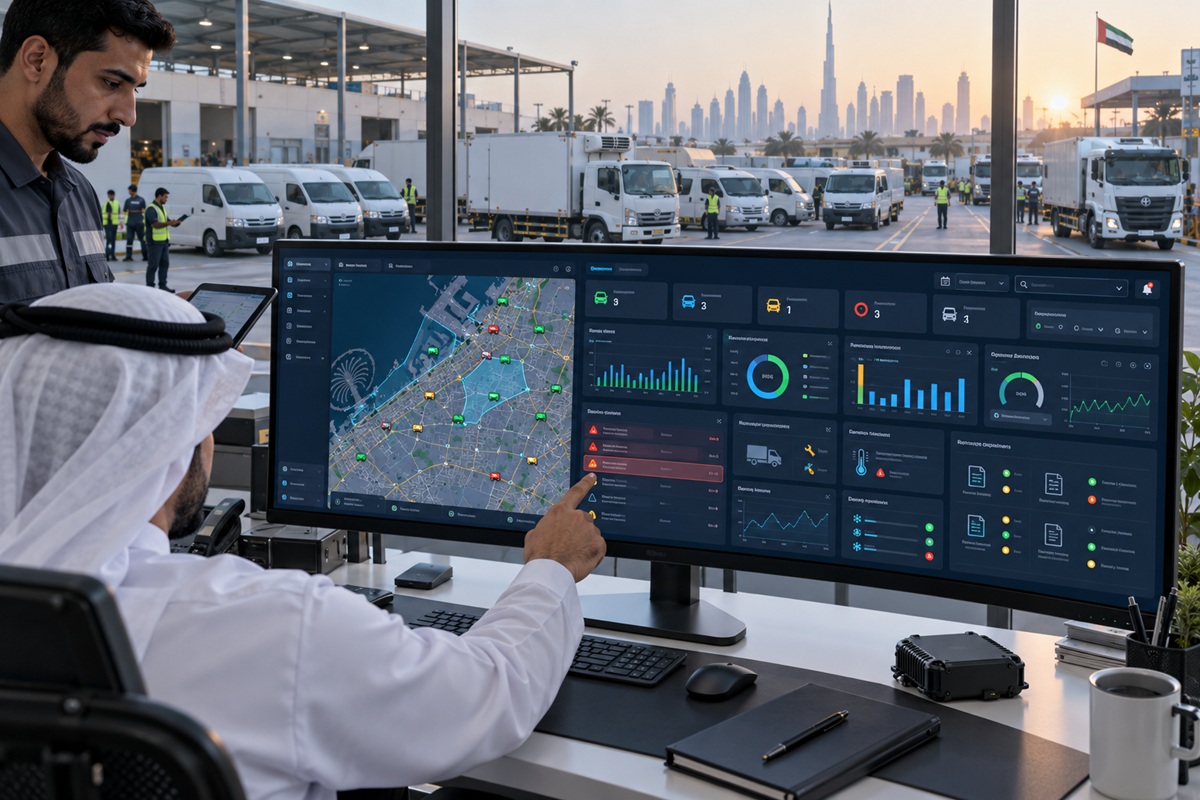
Once the device is installed and the SIM is active, adding the vehicle to the VZone International fleet platform takes approximately 5 minutes per vehicle. Log into the VZone/Wialon fleet platform at your organisation’s account URL. Navigate to Devices > Add Device, enter the device IMEI (printed on the device label and in the box documentation), select the device model from the dropdown (the platform supports 3,400+ device models), and confirm the device type. Enter the vehicle details (plate number, vehicle type, department, cost centre code) and assign the vehicle to the appropriate vehicle group for reporting. Save the configuration the platform will connect to the device within 2 to 3 minutes and show the vehicle on the live map at its current GPS position.
For Asateel compliance configuration, VZone’s platform team completes the ITC portal registration using the device IMEI and vehicle registration details fleet clients do not manage this registration directly. The platform dashboard shows an Asateel compliance status indicator for each vehicle, confirming that the device is actively submitting data to the ITC portal and that the vehicle’s compliance status is current.
Conclusion
Installing a GPS device for car tracking tracking is straightforward once you match the device type to the job: OBD-II for quick, tool-free setup on personal or low-stakes vehicles, and hardwired installation for any commercial vehicle that falls under Asateel, SecurePath, IVMS, or SIRA compliance. Placement matters as much as the device itself in UAE conditions heat-protected, under-seat or behind-trim positioning is what separates a tracker that lasts years from one that fails within weeks.
Once the device is wired or plugged in and the SIM is active, getting a vehicle live on the dashboard takes only a few minutes, and VZone International handles the compliance registration end-to-end so fleet operators do not have to manage the ITC portal directly. Whether you are outfitting a single vehicle or rolling out a full fleet, getting the installation right the first time is what determines whether your GPS investment delivers reliable data from day one.
Need Professional GPS Installation? VZone Covers All UAE Emirates and GCC.
VZone International’s certified installation team provides professional GPS tracking device installation for cars and commercial vehicles across Dubai, Abu Dhabi, Sharjah, Ajman, Ras Al Khaimah, Fujairah, Umm Al Quwain, and major GCC cities. Every installation includes UAE compliance programme registration (Asateel, IVMS, SIRA, SecurePath, OPAL as applicable), tamper-evident mounting, full platform configuration, and compliance status verification. Standard scheduling: 2-5 business days from order. Contact our team to book your installation.
Frequently Asked Questions
The best location for a GPS tracking device for cars in UAE conditions is the under-seat area on the passenger side or behind dashboard trim panels locations that provide protection from direct sunlight (avoiding the 80-90°C temperatures that dashboard-top placement reaches in UAE summer), adequate GPS signal acquisition through the vehicle roof or side windows, and concealment from casual inspection. Avoid dashboard-top and windscreen-area placement in UAE these locations expose the device to extreme heat that shortens device life and causes data gaps. For commercial fleet compliance installations (Asateel, IVMS, SIRA), VZone International's installation team selects the optimal location for each vehicle model during the deployment assessment, balancing heat protection, signal quality, and tamper resistance.
Yes for OBD-II plug-in devices installation requires no tools and takes under 10 minutes. For basic personal vehicle tracking without UAE compliance requirements, self-installation of an OBD-II tracker is entirely feasible if the device documentation confirms it is compatible with your vehicle's OBD-II port. For hardwired GPS tracking devices, self-installation is possible with basic automotive electrical knowledge (fuse tap connection, wire routing, ground identification) but professional installation is strongly recommended for commercial fleet vehicles. For any vehicle requiring UAE compliance GPS (Asateel, IVMS, SIRA, SecurePath), self-installation is not acceptable the compliance programmes require certified installer documentation as part of the device registration process. VZone International's certified installation team covers all UAE Emirates with typical scheduling within 2 to 5 business days of order confirmation.
A correctly installed hardwired GPS tracker for cars draws 50 to 150 milliamps when active equivalent to a low-power LED light from the vehicle's electrical system. When connected to a switched ignition circuit (which deactivates when the ignition is off, as recommended), the device draws zero power when the vehicle is parked, creating no battery drain risk. Some GPS tracking devices have a parking mode that activates on ignition-off and draws a small standby current (5 to 20 mA) to detect vehicle movement or tampering while parked this low standby draw is negligible for vehicles with a healthy battery and will not discharge a battery in normal parking periods. Battery drain risk only arises if the device is wired to a permanently live circuit rather than a switched ignition circuit an installation error that professional certified installation prevents.
For commercial fleet deployments, concealment of the GPS tracking device from drivers is standard practice most fleet GPS policies inform drivers that tracking is active without disclosing the device location. Effective concealment in passenger vehicles involves mounting the device behind dashboard trim panels, inside the centre console housing, or under seats with cable routing fully concealed in existing body channels. In commercial vans and trucks, the cargo area bulkhead panel and the driver's door trim panel cavities are common concealment locations. For maximum concealment with maintained GPS signal quality, an external GPS antenna (a small puck-shaped antenna routed to the roof lining area) with the main device unit hidden in the boot or under the cargo floor provides both effective concealment and optimal signal. All VZone International commercial fleet installations are designed for concealment as standard.
GPS tracking devices in UAE require either a du or Etisalat SIM card providing cellular data connectivity. Standard consumer SIMs work in most GPS devices, but for commercial fleet GPS deployments the recommended option is a machine-to-machine (M2M) or IoT data SIM available from both du (du Business IoT) and Etisalat (eLifeIoT) which provides dedicated low-bandwidth continuous data plans optimised for GPS telemetry transmission, typically at lower per-MB cost than consumer data plans for the continuous small-packet transmission that GPS tracking generates. VZone International includes a pre-configured UAE SIM in all fleet device deployments the SIM is already activated and APN-configured for the Wialon platform before shipment, requiring no SIM management by the fleet operator. For UAE-Oman cross-border deployments, dual-SIM devices with UAE primary and Oman secondary SIM are supported.